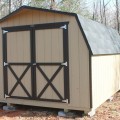
The pops of color in pristine gardens and the meticulous landscaping you see each spring and summer doesn’t happen overnight—there’s a lot of thought, preparation and hard work that goes into these projects. And it all starts about this time of year.

Here, we’ll provide a few top tips on getting your shed ready for spring, as well as some spring gardening tips.

Get Your Shed Ready

Your shed might sit dormant during the colder months—unless of course that’s also where you keep your snow removal equipment! But, either way, your outdoor structure and the items inside it might need a little TLC after winter:

  • Check for leaks; repair if necessary
  • Clean siding and windows; make necessary repairs/touch-ups
  • Check any hooks, inside or outside; secure/repair/replace if necessary
  • Check around foundation for debris/holes; clean and repair as needed
  • Clean and sharpen your tools; repair and replace items, if necessary

Early-Spring Gardening Tips

While there’s an exhaustive list of tips we could share about getting your garden ready for spring, here are a few that might require immediate attention:

  • Remove winter mulch; clean debris from around plants and trees
  • Clean repair garden structures/features (gates, fences, trellis, birdbaths, etc.)
  • Prune and trim plants and trees
  • Start a compost pile, and start with your debris from spring clean-up efforts
  • Revitalize soil and add mulch
  • Plan what you want to plant; order seeds

Adding power to your outdoor structures, whether a shed, playhouse, gazebo or other features, allows you to enjoy them longer and more fully. Maybe some music will add to the ambience of your backyard entertaining, or perhaps you want to ensure your kids’ clubhouse can be used past dusk.

However, lights, speakers, and other tools and amenities require juice. Depending on your set-up and the distance from your home or other conventional source, getting power to your structure might not be easy or efficient. Instead of digging trenches and running wires, you can consider installing solar panels to your structures rooftop. It’s environmentally friendly, too!

Before you fully consider this option, be sure that enough direct sunlight hits your structure. If it’s a go, then you can decide if you’d want to hire a contractor or solar company to install and wire the panels for you, or if it’s a project you and some friends and relatives can tackle. There are many DIY websites out there with detailed information on how to do this—a web search will reveal plans, kits, materials lists and more to help you get started.

Solar power is a renewable energy source, and if you’re looking to learn more about harnessing that sunshine, starting with a smaller project like a shed our out-building could be a practical and fun place to start. 

Your structures are practical—they store items or provide a sanctuary. But they also add to the look and feel of your property. The weather—rain, ice, sleet, snow and even sun—can damage your structures and whatever is inside them. But you can be proactive protecting your structures from weather damage by considering the following points.

Flooring

First things first. When you’re installing your structure, you need to consider the floor. We might instantly think of a solid roof when it comes to leak-proofing a building, but moisture can also come from the ground. It’s best if your structure is elevated slightly, perhaps six inches above the earth. Pay attention to the quality of your foundation. If your structure is already up before your experience these moisture issues, you could look into raising it.

Roofing

Choosing the right pitch for your roof based on the average rain and snowfall of your locale is a good starting point. Flatter roofs don’t last as long as their sloped counterparts in areas that receive a significant amount of heavy snow. Selecting the right roofing material for your climate also plays a role here; maybe a metal roof is a better option, or perhaps shingles will do just fine.

To weatherproof your existing roof, you could install a rubber membrane along the bottom edges. Or you could also upgrade your roof to a more durable material.

Exterior

You can protect your entire wooden structure—weather it is a shed, garage or gazebo—from the elements by sealing it. Wood absorbs moisture, so using a sealer and/or oil-based paint adds a barrier between your walls and water. Don’t forget interior walls—these can be sealed too. Also, it’s important to note that the sun can also do damage. Consider a sealant or exterior paint that also protects against harmful UV rays.

Remember to routinely inspect your structures for signs of weather damage so you can get to any repairs before major issues arise. By staying one step ahead of Mother Nature, you can keep your structures in tip-top shape. 


Leveling Your Valley Structures Buidling

Leveling your Valley Structures storage building begins as we off load the storage shed onto 4 – 4 x 8 x 16 cap blocks, one at each end of the outside skids.  We then place the level on the floor inside the Valley Structures building. We use a jack, sometimes two jacks, to raise the shed until it is level side to side with the highest of the initial 4 blocks. Using a shovel we level off the spots where we place the blocks at the base of each pier. We use only as many blocks as are necessary to be leveled with the highest point. Next we turn the level to check for front to back leveling and adjust the block in the in the piers as necessary to be sure that the Valley Structures building is level both side to side and front to back.

If you choose to watch us complete this task we suggest you watch the doors of your storage building. You will notice as we work that the doors will rise up and down shifting passed each other. Finally as the job is complete you will see that the doors are perfectly lined up.

The size of your Valley Structure building determines how many points we support. The general “rule of thumb” is for supports to be places every 6’ – 8’ along the outside skids and at the ends of the inside skids. The “rule of thumb” may be altered by how you intend to use the Storage Shed, i.e. as a shop with heavy equipment as opposed to general storage. Just talk to our Valley Structures staff and we will be sure the leveling is done to suit your usage. 2. We use the following types of blocks to level your Valley Structures building: 2”, 3”, and 4” “cap” and 8” open web blocks. We use the 4” cap block at the base of each support pier. We never use an 8” open web as the base block since they tend to sink much more quickly. 3. Once the shed is less the 2” out of level we use Pressure Treated decking and Cedar shims to fine tune the leveling. These materials are used due to their ability to with stand the elements. 


When you think of roofing, a shell of framed timber probably comes to mind. But there’s also an array of hardware involved in supporting your structure’s roof. Ties and hangers are crucial components, usually made of steel, that are made to resist tension. Let’s a take a look at some varieties.

Rafter Ties

Rafter ties hold together the bottoms of opposing roof rafters, and they’re intended to keep the walls from spreading apart.

Joist Hangers

Joist hangers strengthen a load-bearing connection. These components come in many sizes, dictated by the size of the beam. Experts will agree that using the proper nails—and proper amount of nails—affect the integrity of the installation.

Hurricane Ties

Hurricane ties are often required components in homes in areas prone to severe windy weather. If your residential or commercial buildings need hurricane ties, then you should also consider them for your outdoor structures. Hurricane ties, which are nailed to the bottom of a rafter or truss and connect to the wall plate, work to prevent the uplifting of trusses.

Seismic Ties

Like hurricane ties, seismic ties help hold things together—literally—when things shake up. Regions that could be impacted by an earthquake use seismic ties to secure items to walls. For example: machinery, appliances, desks, filing cabinets or shelving. 

We are excited to announce that we recently launched a new line of Economy Sheds. These buildings will offer you the same amount of storage space at a reduced cost. They come in the Barn and Cottage style. You will be able to add or change options if you would like. On the taller sided buildings, you have the option of placing your doors in the side of the structure. We anticipate this to be a very popular addition to our line up as people are looking for affordable backyard storage. Whether you're looking for a custom designed building or something from our new Economy Line, we are here to fill your storage needs. 

The Economy Line buildings are available in the Barn or Cottage style in sizes ranging from 6X8 to 12X28. The Barn is available in 3 side wall heights, 4', 6', or 7'. The Cottage is available in a 7' or 8' high side wall. All 8' wide Economy Line buildings will come with a single door, one window and a shingled roof. The 10' and 12' wide buildings will have double doors standard.

Standard options on Economy Sheds include:

Double Door (Single Door on 8' wides)

1 Window

Treated 5/8 inch T1-11 Siding

Shingle Roof


Spring has sprung and this is when we all begin to get to work in our yards and gardens! Whether you currently store all of your tools in the garage or have them scattered here and there, we can help. A garden shed gives you a convenient spot to store all of your mowers, tillers, rakes, etc. 

There are a few things to consider as you begin shopping for your shed. Everyone has a different style, budget, storage needs, and backyard space. There is no "one size fits all" building. A taller wall allows you to hang rakes and bikes. A loft provides space for items you don't use on a regular basis. Shelves and workbenches give you a spot to work. On larger structures, having more than one door is often useful to give you another access point into the shed in case a mower or some other item is blocking an entry. Having a few windows will allow light and ventilation. We offer many additional options to allow you to customize your shed to fit your exact needs.

The easiest way to start is to stop by and browse all of our different styles. We keep our lot full of different sizes, colors, and options.